Modern OpenGL with shaders is used with Python 3.7 via PyOpenGL and GLFW to create a simple hello world script that will be the starting point of diving deep into the GL shader language (GLSL).
This post follows the first and second tutorials found on opengl-tutorial.org where a simple triangle is drawn using OpenGL 3+. The original tutorial is designed around C++ code, but this post rewrites everything for Python. I am using Python version 3.7 and will unapologetically use features that are not compatible with older versions. I won’t repeat the prose of the tutorial except where the Python code is significantly different from the original C++.
The code presented in this post is available at gitlab.com/metamost
Using OpenGL from Python
Installing the packages needed for this tutorial is relatively simple. I am going to use the PyOpenGL and GLFW packages which can be installed using pip.
pip install PyOpenGL glfw
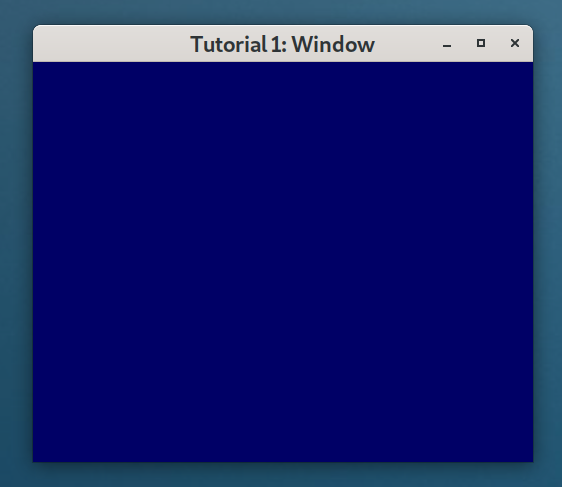
Other than that, the graphics drivers should already be installed and ready to go, so let’s test that (with the actionable items of Tutorial 1 from opengl-tutorials.org). The following script creates a window and sets the background color to dark blue. Notice that the GLFW Python wrapper Pythonizes the whole interface but the PyOpenGL does not, so there’s a mix of different philosophies being used together. It’s not too bad, especially in these small examples, but it is something to be aware of when reading or writing more extensive code. Also, note that the GLEW library is not needed since all the OpenGL functions are already available in PyOpenGL and I didn’t want to clutter the examples with checks for features.
import contextlib, sys
from OpenGL import GL as gl
import glfw

@contextlib.contextmanager
def create_main_window():
    if not glfw.init():
        sys.exit(1)
    try:
        glfw.window_hint(glfw.CONTEXT_VERSION_MAJOR, 3)
        glfw.window_hint(glfw.CONTEXT_VERSION_MINOR, 3)
        glfw.window_hint(glfw.OPENGL_FORWARD_COMPAT, True)
        glfw.window_hint(glfw.OPENGL_PROFILE, glfw.OPENGL_CORE_PROFILE)

        title = 'Tutorial 2: First Triangle'
        window = glfw.create_window(500, 400, title, None, None)
        if not window:
            sys.exit(2)
        glfw.make_context_current(window)

        glfw.set_input_mode(window, glfw.STICKY_KEYS, True)
        gl.glClearColor(0, 0, 0.4, 0)

        yield window

    finally:
        glfw.terminate()

if __name__ == '__main__':
    with create_main_window() as window:
        while (
            glfw.get_key(window, glfw.KEY_ESCAPE) != glfw.PRESS and
            not glfw.window_should_close(window)
        ):
            gl.glClear(gl.GL_COLOR_BUFFER_BIT)
            glfw.swap_buffers(window)
            glfw.poll_events()
This script should get you to a dark blue canvas drawn on a window that you can close with the escape key.
 Notice the use of Python’s
 contextmanager with a try/finally block to ensure GLFW cleans up after itself when the script terminates for any reason.
Vertex Array Object (VAO)
Buffers that hold vertex data (VBOs), in this case corner positions of the triangle, must be bound to a parent vertex array object (VAO). The general idea is that many buffers would be bound to a few VAOs, and switching from one set of buffers to another is done by binding the appropriate VAO. This can be a much faster operation than unbinding and binding all the associated VBOs. At any rate, VBOs can’t be enabled without a currently bound VAO so first, we create one and bind it using a contextmanager to ensure we clean up after ourselves.
@contextlib.contextmanager
def create_vertex_array_object():
    vertex_array_id = gl.glGenVertexArrays(1)
    try:
        gl.glBindVertexArray(vertex_array_id)
        yield
    finally:
        gl.glDeleteVertexArrays(1, [vertex_array_id])
Vertex Buffer (VBO)
When creating the vertex buffer, it is important to match the underlying type of the array data. In this case, the gl.GLFloat type is matched to the ctypes.c_float type. One could (and probably should) use numpy here, but for this small example, using ctypes is sufficient and perhaps a bit more clear on exactly what is going on.
The buffer then has to be bound to a set of vertex attributes that is going to be used in the shaders. The vertex attributes are identified by the attr_id = 0 index below and later by layout(location = 0) in the vertex shader source. Since we the position of the triangle’s corners are not going to change in this example, the buffer data is set to gl.GL_STATIC_DRAW which allows certain optimizations for such objects.
@contextlib.contextmanager
def create_vertex_buffer():
    with create_vertex_array_object():

        # A triangle
        vertex_data = [-1, -1, 0,
                        1, -1, 0,
                        0,  1, 0]

        attr_id = 0  # No particular reason for 0,
                     # but must match the layout location in the shader.

        vertex_buffer = gl.glGenBuffers(1)
        try:
            gl.glBindBuffer(gl.GL_ARRAY_BUFFER, vertex_buffer)

            array_type = (gl.GLfloat * len(vertex_data))
            gl.glBufferData(gl.GL_ARRAY_BUFFER,
                            len(vertex_data) * ctypes.sizeof(ctypes.c_float),
                            array_type(*vertex_data),
                            gl.GL_STATIC_DRAW)

            gl.glVertexAttribPointer(
               attr_id,            # attribute 0.
               3,                  # components per vertex attribute
               gl.GL_FLOAT,        # type
               False,              # to be normalized?
               0,                  # stride
               None                # array buffer offset
            )
            gl.glEnableVertexAttribArray(attr_id)  # use currently bound VAO
            yield
        finally:
            gl.glDisableVertexAttribArray(attr_id)
            gl.glDeleteBuffers(1, [vertex_buffer])
Again, notice the use of a contextmanager to ensure that gl.glDeleteBuffers is called once the buffer is no longer used.
Shader Program
Yet another contextmanager is used to generate the shader program which, in this case, consists of a vertex shader and a fragment shader. For now, both shaders are quite simple and the process of compiling and attaching each shader to the program should be straightforward to understand. The only real complication here is how to determine if the compilation and linking steps are successful. This is done by accessing status and logs with calls to gl.glGetShaderiv().
@contextlib.contextmanager
def load_shaders():
    shaders = {
        gl.GL_VERTEX_SHADER: '''\
            #version 330 core
            layout(location = 0) in vec3 vertexPosition_modelspace;
            void main(){
              gl_Position.xyz = vertexPosition_modelspace;
              gl_Position.w = 1.0;
            }
            ''',
        gl.GL_FRAGMENT_SHADER: '''\
            #version 330 core
            out vec3 color;
            void main(){
              color = vec3(1,0,0);
            }
            '''
        }
    program_id = gl.glCreateProgram()
    try:
        shader_ids = []
        for shader_type, shader_src in shaders.items():
            shader_id = gl.glCreateShader(shader_type)
            gl.glShaderSource(shader_id, shader_src)

            gl.glCompileShader(shader_id)

            # check if compilation was successful
            result = gl.glGetShaderiv(shader_id, gl.GL_COMPILE_STATUS)
            info_log_len = gl.glGetShaderiv(shader_id, gl.GL_INFO_LOG_LENGTH)
            if info_log_len:
                logmsg = gl.glGetShaderInfoLog(shader_id)
                log.error(logmsg)
                sys.exit(10)

            gl.glAttachShader(program_id, shader_id)
            shader_ids.append(shader_id)

        gl.glLinkProgram(program_id)

        # check if linking was successful
        result = gl.glGetProgramiv(program_id, gl.GL_LINK_STATUS)
        info_log_len = gl.glGetProgramiv(program_id, gl.GL_INFO_LOG_LENGTH)
        if info_log_len:
            logmsg = gl.glGetProgramInfoLog(program_id)
            log.error(logmsg)
            sys.exit(11)

        gl.glUseProgram(program_id)
        yield
    finally:
        for shader_id in shader_ids:
            gl.glDetachShader(program_id, shader_id)
            gl.glDeleteShader(shader_id)
        gl.glUseProgram(0)
        gl.glDeleteProgram(program_id)
On cleanup, there is a call to gl.glUseProgram(0) which tells openGL to revert to the fixed pipeline mode and allows us to actually delete the program immediately - otherwise it would be deferred on the call to gl.glDeleteProgram()
Main Loop and Bringing it All Together
The last component we need is the main loop. This is a minor modification of the while loop in the first code example of this post. It consists of a clear, a draw, swap buffers and poll events.
def main_loop(window):
    while (
        glfw.get_key(window, glfw.KEY_ESCAPE) != glfw.PRESS and
        not glfw.window_should_close(window)
    ):
        gl.glClear(gl.GL_COLOR_BUFFER_BIT | gl.GL_DEPTH_BUFFER_BIT)
        gl.glDrawArrays(gl.GL_TRIANGLES, 0, 3)
        glfw.swap_buffers(window)
        glfw.poll_events()
And finally, all the contexts and this loop can be brought together in the actual main section of the Python script.
if __name__ == '__main__':
    with create_main_window() as window:
        with create_vertex_buffer():
            with load_shaders():
                main_loop(window)
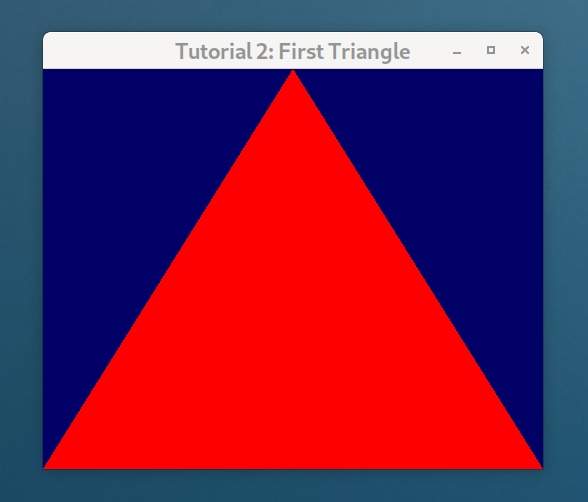
And a glorious red triangle appears (hopefully!)
 And again, please refer to gitlab.com/metamost for full examples.
Update
I’ve continued this effort with another post: Learning OpenGL with Python (Part 2)